Pro Tips #56
Surprise! Custom Fields have gotten Better!
Recently with Lansweeper’s 2024 Summer Launch, we added an inconspicuous little feature change that didn’t get much fanfare – I mean, it’s even the last little bullet-point on the website release page – but it is something that many (including myself) have asked for: We now have the ability to sync on-prem custom fields to our Lansweeper Site Tenant!!
…
<ahem>.
We now have the ability to sync on-prem custom fields to our Lansweeper Site Tenant!!
What’s So Neat About It?
OK. So I might be a bit more excited about this one than most anyone else. What’s the big deal, you didn’t ask? Well, I’ll tell you!
Reporting! One of the other main reasons you probably didn’t use custom fields is likely because you also couldn’t report on them in your Site. Well, now you can! Meaning you can add custom fields in any existing or new report.
No Limits. Custom fields on-prem are limited to 20. In your site, you won’t be limited, make as many as you want.
Custom Field integrations. Custom fields are now also accessible via the API. Not only does this mean they will be available for integrations, but you can even create and adjust custom fields via the API.
Custom field management from a single location. Once the sync is active, the system is designed for you to manage custom fields from your single Site. While you can still create and update fields locally on-prem, best practice is to move you custom field management to your Site.
How It Works
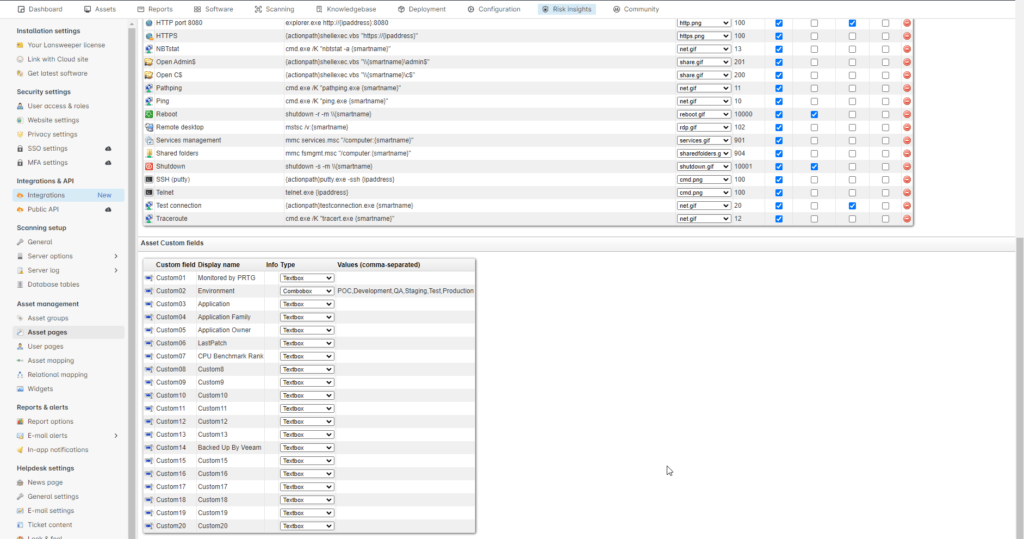
Syncing of your on-premise custom fields (located at Configuration > Server Options > Asset Management Section > Asset Pages) is a one-way sync and designed for you to start managing your custom fields on your Site. However, you can still create new custom fields locally, and adjust existing field values on-prem. The main reason for it being a one-way sync is that a two-way sync would cause a large number of issues due to the complexity and customizability of custom fields.
The sync of your custom fields is a Irreversible sync. Once enabled, custom field sync cannot be disabled. As a result, it can only be enabled by a user who is a Site owner. In order to have the custom field sent to LS Sites, you must rename the field from it’s original field name of ‘Custom(X)’ to something else. The custom field names and type are only synced once, so its best to review them before you enable the sync. Alternatively, you can edit the name or type both on-prem and in your site if needed.
You might wonder how we consolidate custom fields and values from multiple installations without causing duplication and other issues. Well once the sync is enabled the following rules will be applied:
- Same Name and Type: Fields with the same name and type will be combined into one. For radio button lists, combo boxes, and Yes/No values, they will become a dropdown with all values added as options.
- Same Name, different Type: Fields with the same name but different types will create separate custom fields.
- Slot ID: The Slot ID does not affect synchronization and is not included in your site.
- Case and character sensitivity: Fields are case-insensitive (e.g., “po” and “PO” are the same) but character-sensitive (e.g., “P.O.” and “PO” are different).
Best practice dictates that if you have multiple installations, check to ensure your custom fields are consistent between them before enabling the sync.
How to Enable Synchronization
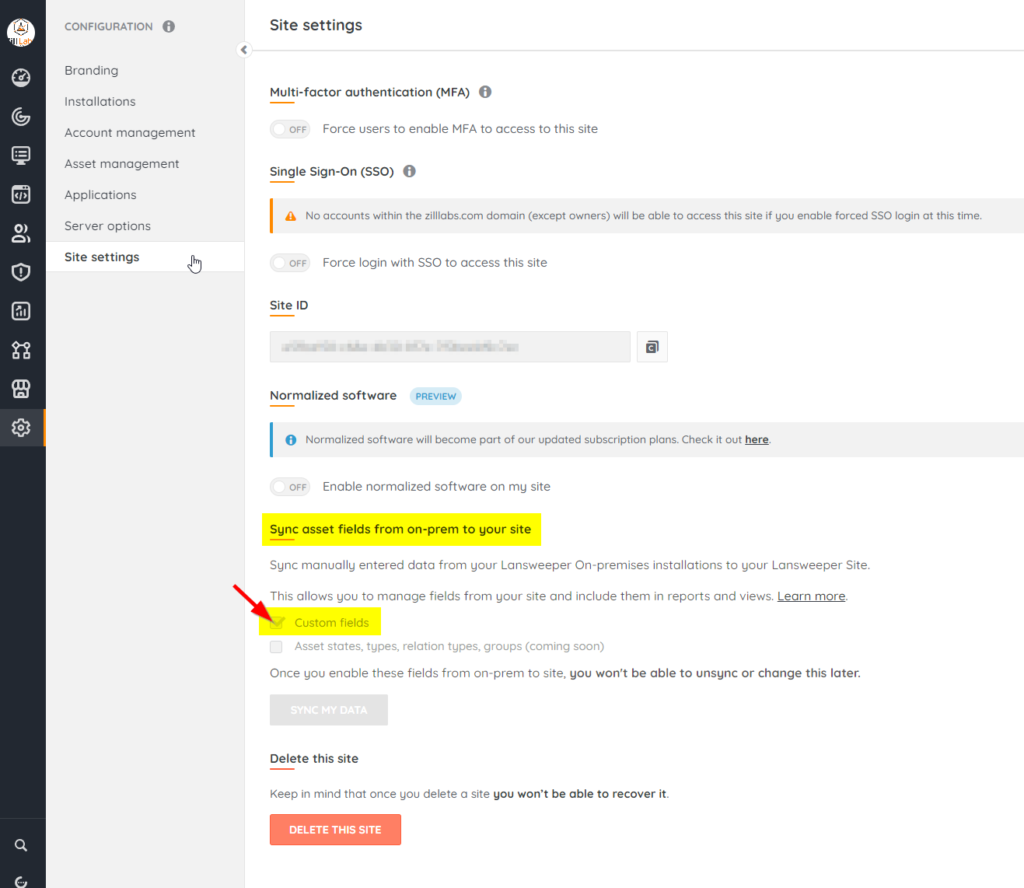
The Sync can be initialized by going into the Site Settings (Gear Icon > Site Settings) and checking the box labeled ‘Custom Fields’ under ‘Sync asset fields from on-prem to your site’, pressing ‘SYNC MY DATA’, and accepting the confirmation prompt:
After the next sync from On-Prem, you will now see the custom fields show up in Lansweeper Sites!
Reports, Views, and Dashboards – Oh, My! An Example Use Case for Custom Fields – Classification and Compliance
Now that we have our on-prem fields in Lansweeper Sites, let’s start working with them! In this example, I will show the following fields which I have written about in a previous Pro-Tip for Asset Classification: (https://www.lansweeper.com/blog/pro-tips/the-importance-of-asset-classification/) as up until now, I haven’t been able to report on those in Lansweeper Sites: ‘Environment‘, ‘Application’, ‘Application Family, ‘Application Owner’, ‘Monitored by PRTG’, and ‘Backed Up By Veeam’
Making a Report and using Filtering
Reporting on Custom fields is super-easy – you simply enter in the name of the custom field – in this example, I am using ‘Environment’ – which shows up under the label/group ‘Custom Fields’ – just start typing the name, and you’ll see it and can add it:

Now that I have a report showing the ‘Environment’ field, I want to know which servers I have that do not have the field defined, so I can make sure to fill out the information in my On-Premise installation – it’s a way of both forcing classification of my servers, and performing other checks and reports on them. To achieve this, under the ‘Filters’ section, I simply add an ‘AND’ operand step, and choose ‘And Environment > Not Exists’
I now have a windows server report that shows assets which I need to define the ‘Environment’ for (oops, I missed classifying two servers):

Creating a View
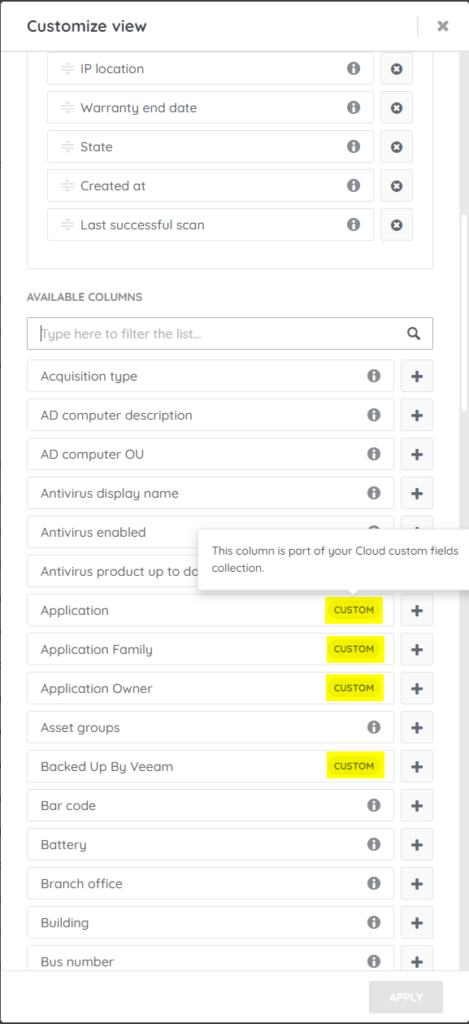
Alternatively, you can create custom asset views showing the custom fields, as they are now included under the available columns. To add the fields, use the search box to find the column you want to add, then click to add it to your custom view. You can now see all of your custom fields (both the on-premise fields you synced as well as the sites-based custom fields) – which are easily seen because they are all tagged with ‘CUSTOM.’
Use Advanced Filters to Fine-Tune the View
In this example, I only want the custom view to show windows servers. Fortunately, you can easily accomplish this with Advanced Filters, which allows you to granularly filter the content from the columns you select.
For my custom view, I can add a filter on ‘OS’ where it starts with ‘Win 2’ to show only assets that are windows servers – because all of the current Windows Server OS’s begin with ‘Win 2’: (if you have Windows NT, rather than fixing this report with ‘OR’ OS contains ‘NT’, you should probably make plans to unplug those things)
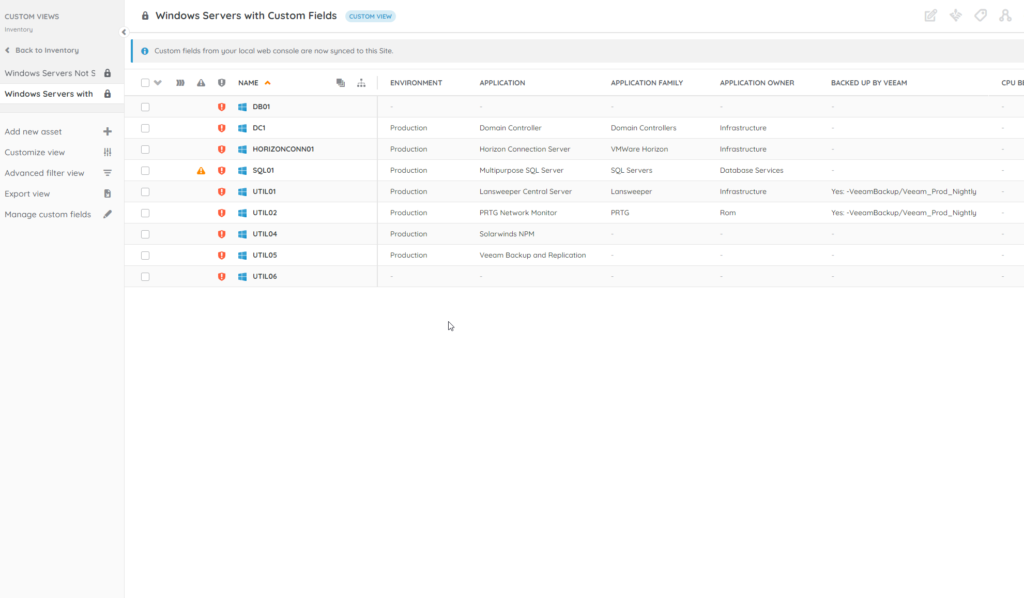
After applying the filter, I now have all the windows servers with the custom fields that I have brought over from on-prem:
Adding the Reports and Views to a Dashboard
While you can use reports, views, and widgets to report on a variety of things, one thing I like to do with my on-prem custom fields is add them to dashboards so that others can quickly see actionable items that they need to pay attention to.
The widgets I like to use for this are:
Numbers: (add widget > numbers> select your report): I like to take a report or view that should not have any results or records returned – and add it to a numbers widget, so that if there’s a number that pops up, you can take action to fix it. In this case, my servers report that do not have the environment field defined – as that should always be Zero.
Report Overview: (add widget > report overview > select your report): This widget recreates the alert dashboards from on-premise, and make a good one-stop list to show reports that need attention.
Tables: (add widget > tables > select your report) This is basically showing a report on the dashboard. I like to take a report and trim it down to just the minimum fields that need to be seen, in order to prevent unnecessary scrolling.
Just like the above example with ‘Environment’ – I have made duplicated the reports and made them for the other fields mentioned previously, to show you an example dashboard.
The following example shows reports based on the custom fields, in three different forms – Numbers, Report Overview, and Tables:
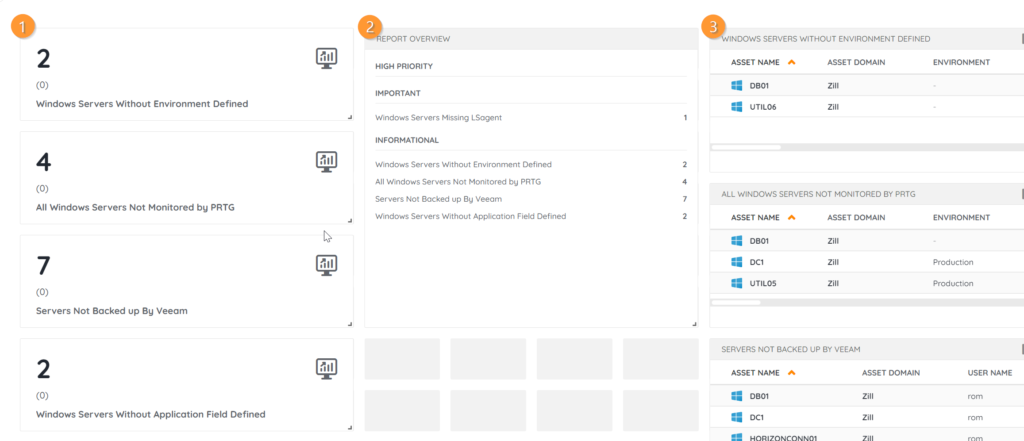
Now I have a nice, custom dashboard of assets that I need to make compliant (put them in PRTG, back them up with Veeam, add server descriptions such as Environment). It’s a really easy way of making sure things are properly managed.
And, something I really like about Lansweeper Sites – when you save the dashboard, you can customize exactly who (if any) you want to see them.
Conclusion
So there you have it – Custom Fields Sync: It’s not just a snazzy catch-phrase that everyone can’t stop saying, or the subject of what will undoubtedly go down in history as one of the top 10 all-time greatest blog posts about Syncing Custom Fields in July 2024… It’s Yet Another Reason to Go Hybrid with On-Prem and Lansweeper Sites, and Maximize the Power of Lansweeper.
Sweep On, Everybody!
-Jacob
For Further Reading
More Custom Field Ideas: – Here’s a good community post about some shared use cases for custom fields: https://community.lansweeper.com/t5/general-discussions/truth-or-dare-share-your-custom-fields-for-lansweeper-classic/td-p/69923
Intro to the Report Builder: https://community.lansweeper.com/t5/cloud/introduction-to-the-cloud-report-builder/ta-p/64549
Intro to Custom Views: https://community.lansweeper.com/t5/6-views-reports-dashboards/custom-views/ta-p/67086
Intro to Dashboards: https://community.lansweeper.com/t5/cloud/manage-dashboards/ta-p/64517