Pro Tips #60
With the 2024 fall launch just behind us, I wanted to highlight the item I am most excited about. Automations open a new world within Lansweeper to close gaps compared to the on-prem version, and allow for completely new use cases that previously were never possible. It is an addition that unlike others is not use case specific, regardless of what you use Lansweeper for, you’ll be able to use this to improve it. Today I will focus on one item particularly for that reason, notifications. Notifications can be used regardless of what you’re trying to use Lansweeper for.
Before I start, disclaimer time! First, Flow Builder is in beta, meaning we constantly update it and its not available to everyone. If you want to give all of the following a try, sign up for Flow Builder access. Second, what I show in the video and below, might, as a result of us changing things, not be completely accurate of the same.
Slack Notifications
Notifications, as I mentioned, can be used for everything, it’s why I wanted to start with this topic. Whether you’re trying to get a notification of a new devices, a new vulnerability being discovered, software X or Y has been installed, or device X or Y breaches compliance, you can think of something for any use case your trying to achieve or improve.
The examples I’ll be showing today are all Slack notifications that will require some basic configuration.
- You will need to create a slack workspace.
- You will need to create a slack app.
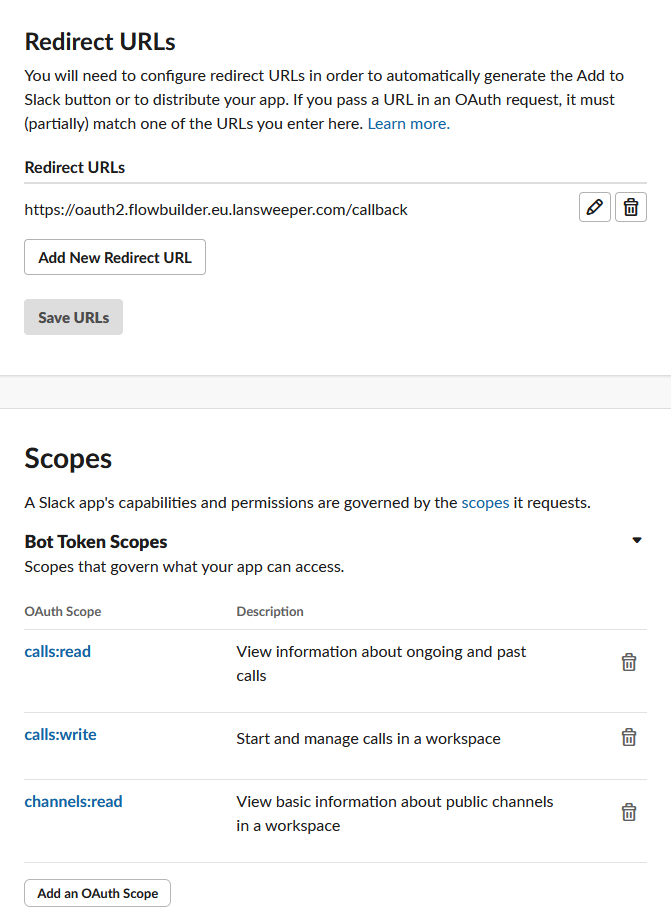
- Your slack app will need the redirect URL: https://oauth2.flowbuilder.eu.lansweeper.com/callback
- Your slack app will need the following permission scopes:
calls:read,calls:write,channels:read
Creating Your First Workflow – Report Result Count Notification
The first workflow I’ll create is a notification that shows you the number of results in a specific report. This gives you all the flexibility to use whatever report you want and allows filter and manipulate your report however you like.
In my example I use a vulnerability report, but this can be used for anything from assets missing an security endpoint solution, to devices that breach your company configuration policy as shown by Jacob a few editions ago.
Trigger
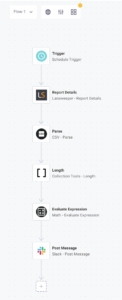
Our first item will be the trigger, this is also what the builder asks you when you start your workflow. Our trigger will be a Schedule, that runs once a day at noon. The reason for this is because we will schedule our report to run once a day at noon as well. This will make sure that every day we see a fresh result notification in our slack channel.
Lansweeper Report Details
Our next step will be adding the Lansweeper app and use the Report Details action. This will let retrieve all the results that are in a specific report.
This action will ask you for a report ID. The report ID can be found in the URL when you are viewing the report after /report-detail/ and ends before the question mark, for example:

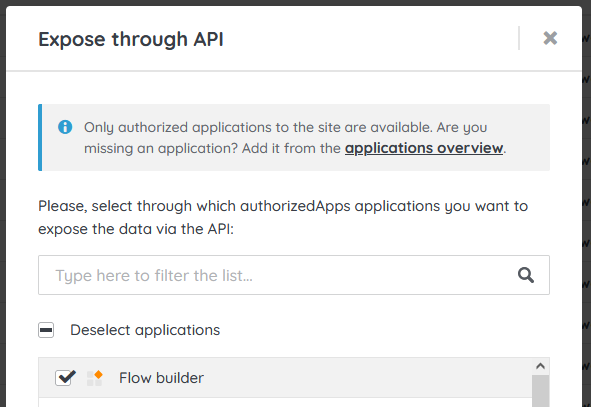
Important for this step: Your report must be exposed to the API. You can do this with the API button in the top right when viewing a specific report and selecting the Flow builder application.
Helpers – Parse, Length, and Evaluate Expression
The next three steps are all categorized as “Helpers” these actions generally perform actions to modify or change data you already have. Since our report data comes back as basically a CSV output, we will need to Parse it first to make it usable, then we use Length to count the number of items and finish it with Evaluate Expression to do the final calculation.
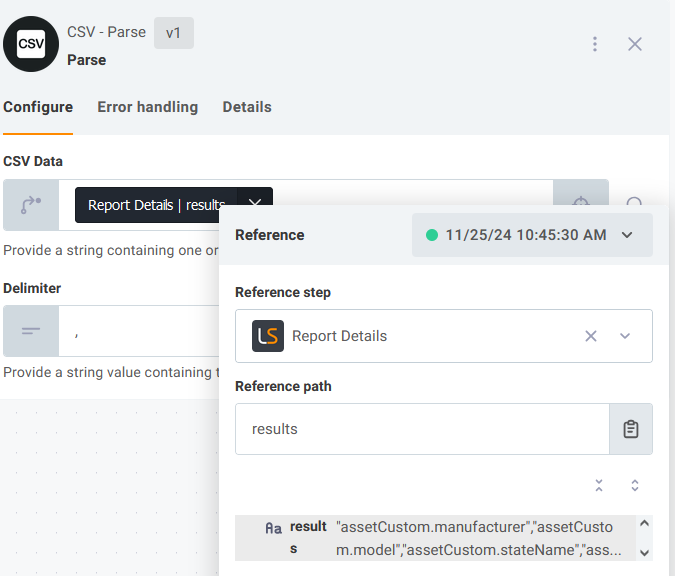
In the Parse step, you will first need to change the CSV Data field from a “Value” field to a “Reference” field so we can refer to the data we received from the previous step. Once you’ve changed the field, it should be straightforward to select the results from the previous step.
With Length we repeat this, change the List field from “Value” to “Reference” and select results.data.
Tip: If the builder doesn’t suggest any items for you to select, try doing a test run first with the “Run” button in the bottom left.
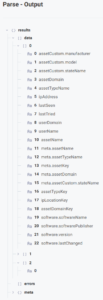
Lastly, in the Evaluate Expression we change from “Value” to “Template” this time. Template will basically give us a free text field that allows text, references and variables. In the Expression, we will now want to add the results from our previous step by adding a reference, and then subtracting that with 2. Why -2? Because we need to deduct the first entry that only contains report headers, and deduct the report last entry which just contains a 0 as seen in the screenshot below.
Tip: Again, use you test runs and select different steps to check and verify the data that is being retrieved.
Post Slack Message
The last step will the the “Post Message” Slack action. All that is left here to do is to once again, change the Message field from “Value” to “Template”. This once again gives you the option to combine text with a reference to the result of the previous Evaluate Expression result.

Now just add your slack channel and you should be good to start testing with the “Run” button in the bottom right. You’re complete workflow should look like this:
Publishing Your Workflow
The next thing to do is set your workflow live. The current method to do this isn’t optimal yet (we want to improve this).
Once your workflow is done and your tests are running successfully, its time to publish the workflow. After it has been published, on the left-hand side, you can click on the marketplace icon to share your workflow.
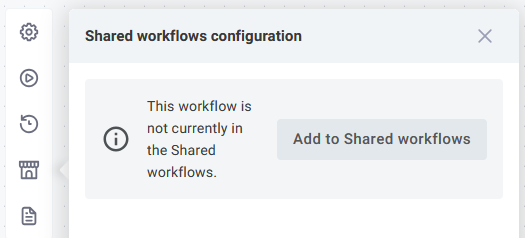
Once you’ve shared it, you can use the Lansweeper navigation to go to your shared workflows. Each shared workflow will indicate whether it is active or not, to activate it, all you need to do is click on it and configure it briefly. This will only require you to quickly re-authorize the slack app.

Importing Workflows
Luckily you don’t have to do all of the steps manually that I mentioned above. While it is the best way to learn how to create your own workflows, you can also import workflows and yes, we do plan to provide easier sharing of workflows between everyone. Below you can find three workflows for slack notifications, starting with the example above
Download Slack Notification: Total Report Results
Full Report Results Slack Notification
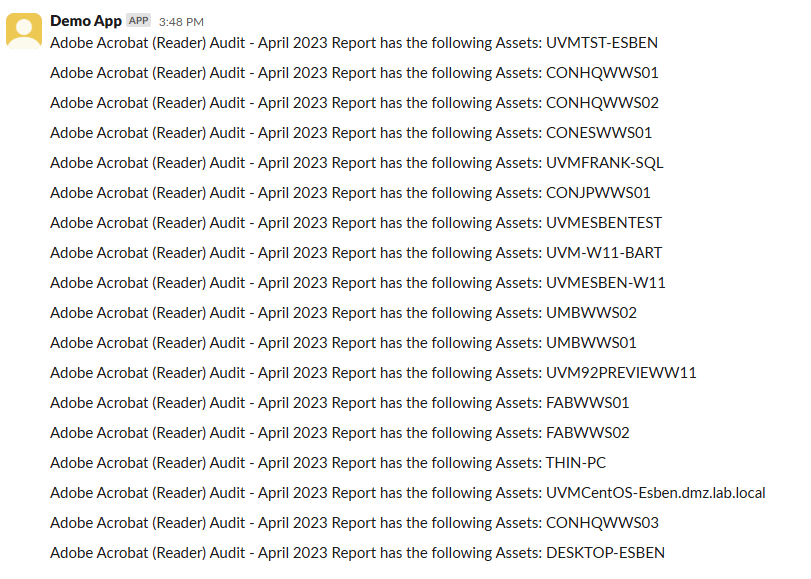
A variant of the example above that I made posts all the asset names of a specific report in a slack channel, this is useful for when you have specific reports that for example list devices that breach compliance or that only contain results of assets that require immediate action.
Download Slack Notification: Report Results
Asset Created Slack Notification
The last Slack notification is triggered via a webhook and provides the link to every assets that is newly created by Lansweeper. Instantly alerting you when a new assets has been created by Lansweeper. This notification does require some extra configuration to setup the webhook, this is all detailed in the video, so I suggest you watch along there it starts around 29 minutes.
Download Slack Notification: Asset Creation

Sign Up for the Beta
The last thing for me to bring up is that all of this is still in beta, which means that you need to sign up before you can get access. If you want to get your hands on this feature, head over to our beta page and sign up for the Flow Builder beta now!